For those that don't know, Gromit Unleashed is a public art exhibition led by Aardman Animations which will see 80 x 5ft tall fibreglass sculptures of Gromit unleashed in Bristol for the summer of 2013. The sculptures have been designed and created by a mix of renowned artists/celebrities and local talent, to form a trail of 80 unique art pieces around the city. At the end of the exhibition, the sculptures will be auctioned to raise funds for Wallace & Gromit's Grand Appeal, the Bristol Children's Hospital Charity. Back in March this year I was hugely excited to hear that the two designs I had submitted to the project had both been selected. This was quite a surprise as I knew there had been quite a lot of submissions. My reasoning for putting in two designs was really just to double my chances, and in case someone else had come up with a similar design. To have the designs accepted really was a great honour, and I feel proud to be involved in such a project which as well as being a lot of fun, should also raise a large amount of money for the Children's Hospital.
In the lead up to the exhibition, most of the designs were kept under wraps, mine included, but now they have hit the streets I am free to show pictures of my designs freely... Hoorah!
This post will show the process involved in creating the first of my dogs "Grrrrromit". This design was selected and sponsored by Trunki and will be located in Windmill Hill City Farm for the duration of the exhibition - July 1st - September 8th.

These are images of the design I submitted, front view, back view and side profile. My concept for the design took on a Mexican wrestler/superhero vibe as I imagined the loveable character unleashing his inner tiger... Grrrrr!!!

The blank canvas! I worked on the painting of my Gromits at a private painting space that had been provided for the project. Over the time I was there all these Gromits (and many more) took on an array of different and colourful guises, it was truly a pleasure to witness. So this was the start, read on to see the complete transformation from the clean white version into 'Grrrrromit' !

After an initial rub down, the first stage was to transfer my design to the 3-dimensional dog. I drew with coloured chalk as it is quite easy to rub out, and pencil can often show through if the paints used are not fully opaque. Main shapes I marked out with masking tape, the blue colour tape I just happened to have but found it enabled me to step back and see the lines/shapes more easily. I also found that by using tape it meant I could adjust it to achieve a straighter line or nicer curve, before using it as a guide to paint along - really useful on such a clean edged/graphic design.

This design purposely used a very limited colour palette. I custom mixed my paints, using Golden acrylics as I believe they have a very high pigment content when compared to other acrylic paints. And then was good to go - my simple strategy for painting... LIGHTEST COLOURS FIRST! The yellow and orange colours I found to be quite transparent, so needed quite a few layers to build up the boldness of colour and for the colours to appear flat, without showing brush strokes.
I held back from starting on the black until the design had been clearly defined by the other colours - any mistakes here would be difficult to hide.

Up until this point in the process, I had worked hard to paint clean lines and flat colours to produce a very graphic look. However, my design included a paint spattered aesthetic - I wanted Grrrrromit to to be a bit rougher, have a bit more energy about him and to feel like he had seen some action! So, basically I masked out areas and spattered paint...

A lightning bolt on his bum... somehow seemed appropriate ?!

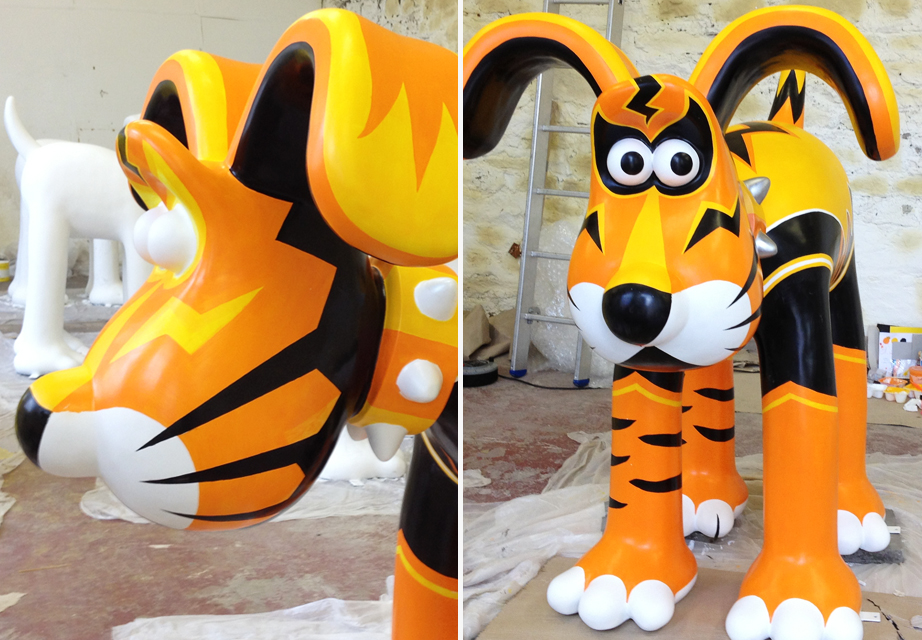
And the final stage, finer details. Stitch lines around his cape and face mask, if I'm honest quite painstaking to do but I think add to the hand-crafted feel I was hoping to achieve for his outfit.

The completed Gromit!

All wrapped up and ready to be varnished...

Below are a couple of pictures from the official launch of Gromit Unleashed.- it was great to see Grrrrromit arrive at the event with some of the other Gromit sculptures on the back of a steam train, driven by Nick Park!


So, that was my journey to create Grrrrromit - I hope you found it of interest. I have also put together a second blog post on the process of creating my other Gromit 'Blazing Saddles'which can be seen here.
If you're in the Bristol area this summer, why not have a wander and see how many Gromits you can spot?!